Install Go and Goclipse on Ubuntu 17.10 and 18.04
Go is an open source programming language with a focus on concurrency mechanisms. Applications written in go can utilize multicore (parallel) execution and provide efficient ways to distribute workload within a clustered environment. In this post, I will walk you through the process to install Go and Goclipse and create a simple hello world project using Ubuntu 17.10 / 18.04.
Prerequisites
We are going to install Go and Goclipse (IDE) on an Ubuntu 17.10 / 18.04 environment. The described process is based on a fresh installation of Ubuntu using a minimal desktop iso image. Let's start to install some dependencies.
Install Oracle JDK 8
First, we need to install Oracle JDK 8 as this is required to start the Eclipse IDE. One way is to use this PPA to install the JDK.
user@user-go:~$ sudo add-apt-repository ppa:webupd8team/java
user@user-go:~$ sudo apt update
user@user-go:~$ sudo apt install oracle-java8-installer
Install git
We also need to install git, this is required to be able to install go related packages and tools.
user@user-go:~$ sudo apt install gitInstall Go
Download binary package
Now we can download Go from the official Go website. At the time of writing this post, the latest version is go1.10.1.
Extract archive to /usr/local
The default or expected location of Go root is /usr/local on Linux systems. Let's extract the downloaded tar.gz file.
user@user-go:~$ cd ~/Downloads/
user@user-go:~/Downloads$ sudo tar -xzf go1.10.1.linux-amd64.tar.gz -C /usr/local
Adjust PATH variable
Additionally, we should add the location of the extracted Go binary to the PATH variable. An easy way to globally add Go to the PATH variable is to edit /etc/profile.
user@user-go:~$ sudo nano /etc/profileWe simply have to add the following line to the end of this file:
export PATH=$PATH:/usr/local/go/binAnd finally, we have to reload /etc/profile to apply the changes in the current session.
user@user-go:~$ source /etc/profileCheck the Go installation
Let's quickly check if the go command can be found.
user@user-go:~$ go version
go version go1.10.1 linux/amd64
I would also recommend checking the go environment.
user@user-go:~$ go env
GOARCH="amd64"
GOBIN=""
GOCACHE="/home/user/.cache/go-build"
GOEXE=""
GOHOSTARCH="amd64"
GOHOSTOS="linux"
GOOS="linux"
GOPATH="/home/user/go"
GORACE=""
GOROOT="/usr/local/go"
GOTMPDIR=""
GOTOOLDIR="/usr/local/go/pkg/tool/linux_amd64"
GCCGO="gccgo"
CC="gcc"
CXX="g++"
CGO_ENABLED="1"
CGO_CFLAGS="-g -O2"
CGO_CPPFLAGS=""
CGO_CXXFLAGS="-g -O2"
CGO_FFLAGS="-g -O2"
CGO_LDFLAGS="-g -O2"
PKG_CONFIG="pkg-config"
GOGCCFLAGS="-fPIC -m64 -pthread -fno-caret-diagnostics -Qunused-arguments -fmessage-length=0 -fdebug-prefix-map=/tmp/go-build439470921=/tmp/go-build -gno-record-gcc-switches"
The most interesting parts at this point in time are:
- GOROOT: This variable points to the location of our Go installation.
- GOPATH: This variable points to Go's default location (~/go) for our own projects. We will use the default location in this example. In case you prefer a different location you have to change the GOPATH environment variable.
Install additional tools
Now we can install additional tools (gocode, guru and godef) that will simplify working with Go in the IDE. These tools are mainly related to auto-completion and showing package/method descriptions.
user@user-go:~$ go get -u github.com/nsf/gocode
user@user-go:~$ go get -u golang.org/x/tools/cmd/guru
user@user-go:~$ go get github.com/rogpeppe/godef
Packages and tools installed with go get are usually installed within the GOPATH location. Let's check if gocode, guru, and godef were installed correctly.
user@user-go:~$ ll ~/go/bin/
total 24836
drwxr-xr-x 2 user user     4096 Apr 21 00:24 ./
drwxr-xr-x 4 user user     4096 Apr 21 00:18 ../
-rwxr-xr-x 1 user user 11183884 Apr 21 00:18 gocode*
-rwxr-xr-x 1 user user  5834221 Apr 21 00:24 godef*
-rwxr-xr-x 1 user user  8397639 Apr 21 00:20 guru*
Install Eclipse
Now we can install Eclipse. For this post, I have decided to use Eclipse Neon as it seems to be more stable than Eclipse Oxygen. Eclipse Neon can be downloaded from here.
Let's extract the archive.
user@user-go:~$ cd ~/Downloads
user@user-go:~/Downloads$ tar -xzf eclipse-java-neon-3-linux-gtk-x86_64.tar.gz
To install the goclipse plugin we first have to start Eclipse and select "~/go" as our workspace location.
Install Goclipse
Goclipse can be installed using Help -> Install New Software. We only have to enter the URL http://goclipse.github.io/releases/ in the "Work with:" section.

After restarting Eclipse the plugin is available and we can continue configuring the plugin with Window -> Preferences -> Go. In my case, the tools section is being opened. Let's add the previously installed Go tools.

We simply have to add the following paths:
- gocode: ~/go/bin/gocode
- guru: ~/go/bin/guru
- godef: ~/go/bin/godef
Additionally, in the gofmt section, I have unchecked the "Use default location (from Go installation)" as the Go installation path has not been configured yet.
We also have to specify the path of the Go installation (GOROOT)

In the Go installation section, we simply select "/usr/local/go"
After setting the Go installation location we can quickly go back to the Tools section and double check that the gofmt location has been updated as well (/usr/local/go/bin/gofmt).

Create a hello world project
To test if the goclipse plugin has been configured correctly, we are going to create a simple hello world application. To create a new Go project we can select File -> New -> Go Project. For this example, I have selected "helloworld" as the project name.
In the source folder, we create a new folder named "helloworld". And within the new helloworld folder we create a new Go file named helloworld.go (New -> Go File). Let's add the following code fragment to the helloworld.go file:
package main

import (
    "fmt"
)

func main() {
    fmt.Println("Hello World!")
}
To execute the code we right click on the file and select Run As -> Go Application. The console will print out "Hello World!"
After executing the helloworld application the project structure looks like this:
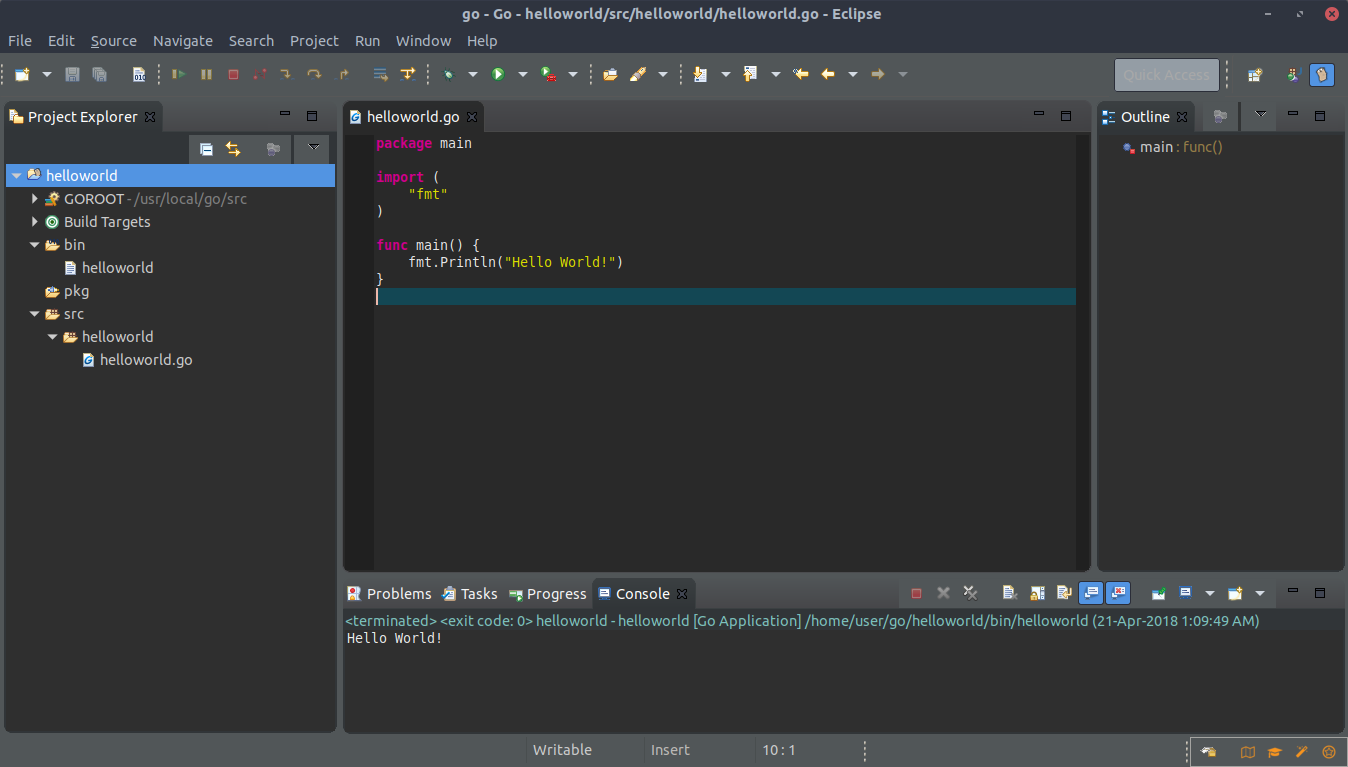
The compiled executable binary file helloworld is available in the project bin folder.
Tags
AOP Apache Kafka Bootstrap Go Java Linux MongoDB Nginx Security Spring Spring Boot Spring Security SSL ThymeleafSearch
Archive
- 1 December 2023
- 1 November 2023
- 1 May 2019
- 2 April 2019
- 1 May 2018
- 1 April 2018
- 1 March 2018
- 2 February 2018
- 1 January 2018
- 5 December 2017
- 7 November 2017
- 2 October 2017